In late 2010, the Google Android team sent a few Android phones to near space using weather balloons, cameras, GoPro video cameras and what looked to be some custom GPS antennas. After seeing the results, I decided to follow suit and send my HTC Desire 33km into the sky. I wasn't concerned with video, weather or temperature data; I just wanted some great shots of the area around Vancouver and to capture the curvature of the Earth.
To do this I would need a Canon camera running CHDK with a script that would automatically adjust aperture, shutter, take a picture every 30 seconds, auto focus and not adjust the ISO. The screen on the camera would also need to be turned off to save battery power. The simplest solution to this was to plug in a pair of headphones to the A/V out port. This disabled the screen. Extra power was to be provided by an external power source plugged into the DC power port. Thanks to the community over at CHDK for the script!
The phone needed the ability to send real time tracking back to me somehow. The app that was decided on was Instamapper, a simple app that relayed the phone's position to a website and plotted its location on Google Maps. The app also needed to be able to resume communication should the signal drop off. This was important as the balloon was going up to 110,000 feet, consumer GPS cuts out at 60,000 feet. The other app that was used is called My Tracks, a really neat app that gathered all kinds of data about position, speed, height, trip time and trip distance. Thanks to the Android Community over at Reddit for helping me out with the apps!
Two power supplies were used. For the camera, 4AA batteries hooked up in series and parallel to give 3v. The phone used 3AA batteries hooked up in series to give 4.5v, enough to keep the phone charging and powered for the duration of the trip. Energizer Lithium were decided upon due to their light weight and ability to perform in cold temperatures. A hand warmer was also packed into the payload to keep the phone and power supplies warm. At 60,000 feet up it would be -60 Celsius.
The enclosure is just pink 1" Styrofoam insulation bought at Home Depot. It was glued together using silicon and hollowed out with a Dremel. A layer of metallic ducting tape was used to increase radar visibility, but the whole thing was taped up using regular duct tape. The rigging is just some small climbing rope purchased at MEC.
The parachute was purchased from RocketMan and is 6 feet across. The balloon was from Kaymont, the 1500g model. It has a burst altitude of 115,000 feet.
Flight prediction was handled by the CSUF Landing Predictor. Launch site was in South Richmond, in a park next to a high school. CSUF predicted that it would land on the south side of Burnaby Mountain. Choosing a launch location was tricky as the weather in and around Vancouver can change frequently and there is a lot of water surrounding the area. The sweet spot for it to land was out in the Fraser Valley, in the Aldergrove area. Launch day was continually delayed due to poor weather conditions and the risk of the payload going for a swim.
Initially I planned to use hydrogen, hence the name 'Hindendroid' but I decided against it for two reasons; the first being that driving into the bowels of Richmond with essentially a bomb in the car seemed risky, the second was that should the balloon catch fire during the filling process the flame is almost invisible. Sadly I settled on the much more mundane (and expensive) helium.
Canon Powershot SX100IS with power pack:
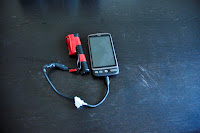
HTC Desire with power pack:
Power packs and camera:
Power packs, camera and phone:
Packaged up and ready to soar:
Styrofoam, cut out using a Dremel:
Super high tech anti-tangle mechanism attached to the parachute:
Total payload weight was 1032 grams.
Filling up the balloon - 115 cubic feet of helium was used.
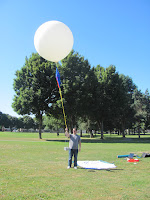
Ready for launch:
Away it goes:
Launch occurred at 10:32AM, PDT, August 20th 2011.
The first shot taken after launch:
YVR, Richmond, Downtown Vancouver and the North Shore Mountains:
Ice on the lens:
That little dot is the moon, which was out during the launch.
The descent:
Landing was dangerously close to the water:
Speeds were dizzying!
Final resting spot, in the foliage north east of Twin Islands in Indian Arm:
Looking north up Indian Arm after a successful retrieval:
Flight path and predicted path:
The balloon landed right in the heart of some proper West Coast rainforest. The balloon had stopped moving and was only 400m from water, 232m in elevation. We drove to Sasamat Lake, just outside of Port Moody. The first recovery mission was on foot on the launch day but the foliage was too dense and it would have taken 4 hours just to get to the landing area, then it would have to be located. After hiking 2.5 hours we headed for home as it was getting dark and we were pretty beat up. The next recovery attempt happened the following weekend, involved a boat rental, a rocky area to put in, a whole lot of GPS tomfoolery, and a lot more searching and hiking. The payload was finally located after bush whacking through chest high ferns and salal, 10 feet up a tree and easily reached. The balloon was still attached, shredded and tangled up in the parachute's rigging.
Here's a map of the recovery mission, which was a lot of fun to go through the Burrard Inlet and halfway up Indian Arm.
Balloon remnants:
Here's the complete album
Fun facts:
4AA Lithium Batteries will take 812 photos over a period of 7 hours
3AA batteries and an Android phone running Instamapper and My Tracks will last for 22 hours
130 cubic feet of helium and a nozzle will cost $140
Anyone can buy a weather balloon
Special thanks to Hanna, Gordie, Kevin, British Glenn, Mark and all the various vendors that helped me out and answered my questions.


